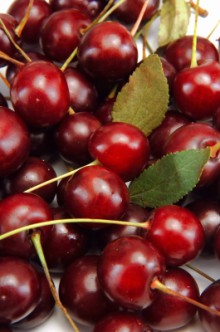
Cherry Wine

Ingredients for 23 litres:
- Cherries – 25 pounds (11Kilograms)
- Sugar – 10 pounds (4.5 Kilograms)
- Vintner-s Grape Concentrate – 9 ounces (250 mL)
- Muslin Fruit Straining Bag – 1 each
- Acid Blend – 2½ teaspoons
- Pectic Enzyme – 2½ teaspoons
- Yeast Nutrient – 3 teaspoons
- Campden Tablets – 3 each
- Super-Kleer Finings 2 fluid ounces (60 mL)
- Potassium Sorbate 1½ teaspoons
- Tannin – 1 teaspoon
- Yeast Lalvin EC1118 – 1 package
Step No 1 – Primary Fermentation – Day 1
1. Prepare the cherries by crushing them, placing inside the nylon straining bag.
2. In a Food Grade plastic fermenter pour in 2 gallons (7.5 Liters) of warm water, the sugar and the grape concentrate (if required). Add Campden Tablets crushed.
3. After 48 hours add the tannin, acid blend, pectic enzyme and yeast nutrient.
4. Bring the contents of your fermenter to the 6 US gallon (23 Liter) mark using cool water. Stir well. Using your hydrometer and hydrometer test jar, check for the desired starting Specific Gravity. This reading will determine the potential alcohol of your wine (approx. 10.5-11.5% alc/vol). If mixed properly your Specific Gravity should be between 1.065 and 1.072.
5. Check the temperature of the wine must (mixture) using your floating thermometer. Open the yeast packet and gently sprinkle over the must. The temperature should be as close to 75-80°F (21–24°C) as possible to activate the yeast.
6. Loosely cover the primary fermenter with a plastic lid and place in a warm area (75-80°F/21–24°C) to maintain a constant temperature for the next few days. Fermentation will start within 24–48 hours if the temperature is kept constant.
7. Using a mixing spoon or brewing paddle stir the floating cap of fruit pulp into the fermenting must twice a day during this period. This will ensure maximum fruit extraction.
Step No 2 -Secondary Fermentation – Day 6 – 8
Note: When the Specific Gravity reaches 1.005 – 1.010, usually 6 to 8 days, (it depends on the fermenting temperature; the warmer the temperature the faster the fermentation) it is time to rack (siphon) the wine into the carboy (secondary fermenter). Your must is now referred to as wine because it contains alcohol.
1. Carefully rack the wine into a clean and sanitized carboy (preferably glass) using a proper siphon system, leaving all the fruit pulp behind. Prepare your residual fruit pulp for juice extraction. Sterilize the muslin straining bag with sulphite solution then rinse well. Place the fruit pulp in the muslin bag to squeeze out the excess juice. Add this excess fruit juice to your carboy. Discard the spent fruit pulp.
2. If the wine level is not within 2 inches (5 centimetres) of the top of the carboy neck use some white, rose or red wine (use the same color as your must) to top up the carboy air space. Never use water to top up a fruit wine; it will dilute the body and flavor of your wine. It is important to reduce the amount of air space in the carboy so as to minimize oxidation (a slightly bitter taste caused by prolonged exposure to oxygen).
3. Sterilize your airlock and rubber bung. Fill the airlock with a neutral solution (preferably sulphite) or water and insert the airlock and bung into the carboy neck opening.
4. Leave the carboy at a temperature between 75-80°F (21–24°C) for a further 18-20 days to finish fermentation. After 18 days, check the Specific Gravity. You should get a reading of 1.000 or less. If the Specific Gravity is above 1.000 allow a few more days of fermentation and then check the Specific Gravity again. Bru-Berries fruit wines finish medium-dry. To make a sweet wine add a commercially prepared Wine Sweetener & Conditioner to your wine just prior to bottling.
Step No 3 -Stabilizing & De-gassing – Day 28
Note: To clear your wine faster you should now rack your wine into a sterilized carboy (backup carboys are very helpful for this) before stabilization, leaving the lees (sediment) and any residual fruit pulp behind.
1. Dissolve the Potassium Sorbate into 1 cup (250 mL) of wine. The Sorbate will ensure fermentation ceases. Add this mixture to the carboy and stir vigorously (using the handle end of your mixing spoon) for 2–3 minutes to release any excess CO2 gas. This is very important.
2. Add the Super-Kleer finings. Super-Kleer will help your wine clear faster. Pour the Super-Kleer into the carboy and stir gently, using your spoon handle, for 2–3 minutes to mix the Super-Kleer into the wine.
3. Top up the carboy air space with wine (same procedure as before). Place the wine in a cooler area between 60-68°F (16-20°C) to clear faster. Stir the wine twice a day over the next two days to rid it of any excess carbonation. Always make sure the airlock and bung is secure after stirring and the airlock is full of solution.
Step No 4 – Clearing – Day 30
After 2 days of stirring, leave your wine in a cool area for 5-12 (preferably) days to clear.
Step No 5 – Filtering & Bottling – Day 42
Your wine is now ready for bottling. To give your wine a professional appearance, it is recommended to filter before bottling.


